
Rhino-Rack Vortex StealthBar Roof Rack - Raised, Factory Side Rails - Aluminum - Silver


To see if this custom-fit item will work for you please tell us what vehicle you'll use it with.


Thank you! Your comment has been submitted successfully. You should be able to view your question/comment here within a few days.
Error submitting comment. Please try again momentarily.


These elliptical aluminum crossbars cut cleanly through the air for a quieter ride. The built-in rubberized Vortex strips break up airflow to reduce drag and wind noise, so you can cruise without that constant whistle. Even at highway speeds, the low-profile shape helps keep things calm and efficient.
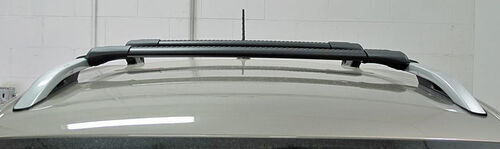
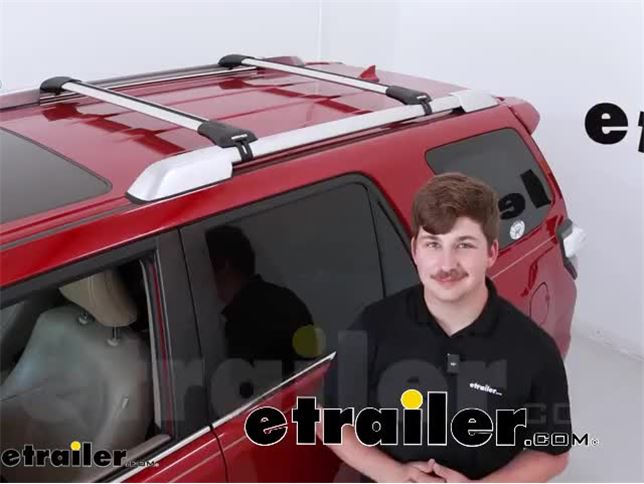
The flush design keeps the bars tucked neatly between the side rails, raising the rack only 1-3/8" above them for a sleek, from-the-factory appearance. No awkward overhang or bulky brackets—just a smooth roofline that looks like it belongs there. The matte silver finish adds a subtle, clean touch that blends in effortlessly.
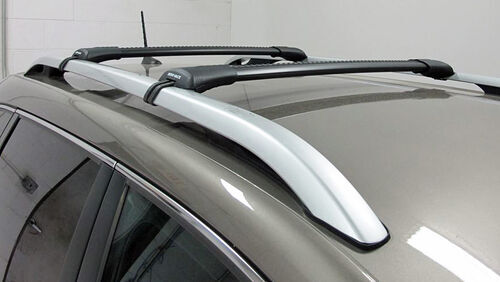
Whether you’re hauling kayaks, bikes, skis, or a rooftop cargo box, these bars make it easy to switch things up. Each crossbar has a built-in C-channel for channel-mounted accessories and also supports clamp-on options. The three-piece Vortex strips can be removed or trimmed around mounts so the channels stay sealed and quiet when not in use.
Lightweight, structural-grade anodized aluminum with an internal H-shaped extrusion gives these bars serious strength without extra weight. The UV-treated, glass-reinforced nylon legs handle weather extremes year-round. Integrated locks in each leg secure both the rack and any gear mounted in the top channel, so everything stays put wherever you park.
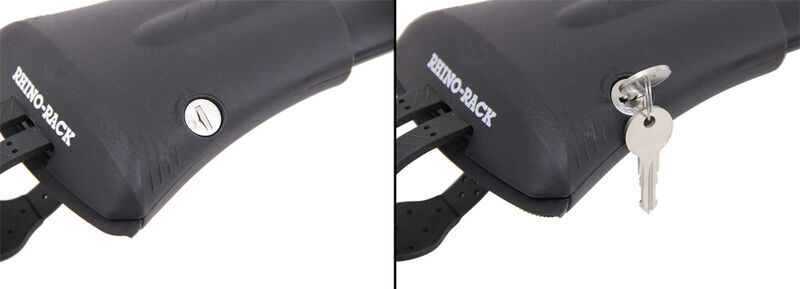
The system arrives almost fully assembled, saving you time during installation. Rubber-coated stainless steel straps wrap completely around raised side rails for maximum contact and grip without damaging the finish. Once tightened down and locked in place, it feels like part of the vehicle rather than an add-on.
 Alternate Instructions
Videos are provided as a guide only. Refer to manufacturer installation instructions and specs for complete information.
Hi everyone, Aidan here with etrailer. Today we're gonna be taking a look at the Rhino-Rack Vortex StealthBar roof rack system and seeing how it installs. This is gonna be for factory raised rail systems and give you a flush design roof rack. That means there's gonna be no crossbar overhang on the sides for a very clean appearance and because it mounts to your factory raised rails, these raised sections with the gap underneath, the install process is gonna be very, very easy. Let's check it out. Now this comes in a variety of different fits for different vehicles.
Whether you've got a 4Runner like we do today or a different vehicle with factory raised rails, you're gonna have different kits. Be sure to utilize the fit guide on our website, put your vehicle information in and find the right one for your vehicle. But regardless of which one you go with, the installation process is gonna be very similar. So you can watch how we did it on this 4Runner today and give you a better idea of how you're gonna do it on your own car at home. Let's check it out.
Now this is gonna be Rhino-Rack's Vortex Bar which is their aero bar. It's gonna be a nice taper design on both the back and front, making this a good one for cutting through that wind and minimizing wind noise. The weather strips up top are gonna help with that too. If you don't have those weather strips in it will make a lot of noise, so just be cautious of that and be sure to put them in whenever you start your install and they're gonna be a great crossbar for really any sort of accessory. You've got that T-track up top if you choose to use a T-track accessory but they're great for clamp around accessories too and leave enough room underneath where I think most clamp around accessories will be just fine even if you have hand knobs underneath your accessory.
Aside from the clean look, there are some benefits to going with a flush design like this. A lot of people like to have crossbar overhang for the function of it because certain accessories like a load assist kayak carrier that'll help you lift your kayak up and into place requires a crossbar overhang. Or maybe you're just mounting up an awning or multiple accessories and you need the extra room. In those cases, I always recommend having longer crossbars but if you're only using this for a single accessory maybe just a roof box, whether it's for looks or just calling some extra stuff on your family vacation maybe just a basket or even just two bike racks. There's plenty of room up here for two bike racks.
Regardless if you're using this for very few accessories and you don't need all that space, then something like this works perfectly and gives you a clean look in the process. The aluminum crossbars are gonna be great for rust resistance, keeping them resistant to the elements over time. So when you're leaving this on your roof it's not gonna be affected and it maintains a good amount of strength. It does have a 176 pound weight capacity and that's for the crossbar roof rack system. Be sure to check what the roof capacity on your vehicle is because if it's lower you want to go by the lowest rated component. And as we can see, they are a silver crossbar. You can get them in black too. Nothing functionally changes, just the look of it. So if you've got a vehicle where you wanna match it a little bit better, you can. Your kit does come with two keys to correspond with the locks on the feet here. Those are going to let us unlock these and access things like that T-track underneath where you can pull up that weather strip and slide your T-track accessories into. Or if you need to adjust the spacing of these crossbars to maybe accommodate a different accessory, you can loosen up the clamps and move them front to back as you see fit. Then when you're done, the covers will just pop right back into place, giving you a clean look but also keeping things protected and locked. And because there's no fixed mounting points here you just mount it to wherever your factory raised rails are and what works best for you. The installation process is very straightforward. The only measurements we need to take is between one crossbar and the other making sure that they run parallel. But as far as that install process goes, we're gonna walk through that with you right now. Now the first thing we need to do for our install is get our crossbar laid out. I recommend having a flat surface to work just so you can keep everything straight and we're gonna pop these end caps off and get some things set up on the table before we take it to the roof. First being our end pieces. These are gonna be the rubber pads that sit in between the plastic here and our raised rails on our vehicle. So just line it up with the shape. There's two tabs that'll line up with two holes on the foot. So get those lined up and push them in. Now if they don't go in all the way, that's fine. As we tighten things down they'll kind of wedge themselves in place, right there's good enough and we'll do that on both sides. While we've got the bar upside down, we're gonna loosen these security screws just a little bit. You don't need much just enough to pull the foot out. You'll feel when it loosens up. We can pull the foot out as far as it'll go on both sides and then flip the bar back around to add in our weather strips. Now you get two of these with your kit and it's not enough to fully cover the bar here but once the covers on the foot pack it'll sit there underneath so you won't see any gaps. So my best advice is to just get this laid out as centered as possible. That looks good there. And just add in that weather strip. The best trick for the weather strip is to get one side started and then just kind of go down the line pressing the other side in. The rest of our work on the table will be done right in here. So flip this bar up and it's gonna expose a screw underneath down in the foot pack. You wanna loosen and fully remove this. And all of this is using the same provided Allen key so no need to keep any extra tools straight pop that out and take your band. Now there's going to be a series of numbers here depending on the vehicle and the type of fit that you have, you'll use a different number. You can find those in your instructions. Or if you need vehicle specific instructions you can find those on Rhino-Rack's website. But for our application today, we're gonna be going towards the number one hole. So that will just feed up this slot on the bottom of our foot line up with the hole we just removed this screw from and add it back in and tighten it down. Repeat these steps on the other side as well. When we're done, fold that bolt back over. And once we get this to the roof what's gonna happen is we'll set this wedge on the inner edge of our raised rail. The band will wrap around the underside and hook into this block right here wrapping around that raised rail on our roof. We'll just repeat this whenever we get up to the roof, but I wanted to show you down here where it's a bit easier to see. With all that done, we can take this to the roof where we want to feed it across to the other side trying to wedge it in place as best we can. Now it could be really helpful to have an extra set of hands here on the other side to just grab the bar once it gets over there but it's definitely doable on your own. And as you're doing this, you want to take measurements from one crossbar to the other or from some fixed point on your vehicle to the crossbar in the case of that first one. For us today, I'm actually going to just wedge it right up against this edge on the raised rail making it very easy to tell what's running parallel. But you just wanna take those measurements to ensure the bar's running parallel to each other and aren't crooked on the roof. I'll do my best to keep my hands out of the way here. Just replicating that thing we did on the table getting the band wrapped around the block there. It is a little bit hard 'cause it is a metal band and it kind of digs into your fingers as you try to get it started but right there is looking great. Do that on both sides and use the included tool to tighten it down evenly. Now as we're tightening this, Rhino-Rack doesn't have an included tool to judge how tight it is. They don't list any specific torque rating so get it snug on both sides, not overtight but enough to keep it very still and make sure that this band is sitting flushed to the raised rail. With the bands tightened down, we can't forget about that one screw we loosened in the very beginning underneath the foot pack. Again, use the same tool. I find it's helpful to just reach under with one hand to find where that screw is located. Use the other hand to get the Allen key in place and just turn it tight as best you can. It's a little hard since it's underneath the crossbar and not visible, but once it's tight, you're good to go. You can lock up the end caps here so insert your key into the lock core. Get that slit in kind of at a diagonal angle between the locked and unlocked icon. Twist it to the unlocked and lock it to add the core. Then you can unlock it to add it back up to the foot here. Now I'm gonna have this set up so that the lock core is on the back so we don't have to see it whenever we're facing our car. So get that lined up, push it into position and lock it up. And that'll do it for our look at the Rhino-Rack Vortex StealthBar roof rack system. This is gonna be a great option if you're looking for a clean install process for your factory raised rails. And it's gonna give you a good method to mount up some accessories. Like I mentioned before, if you need more space for other things or overhang for specific accessories like a load assist kayak carrier, then yes, maybe a roof rack system with an overhang would be a better fit. But if you're looking for something clean and simple, then this could be the one for you. Thanks for watching.
Ratings & Reviews

Tilas

5/27/2026
Works great , a bit noisy on some heavy wind days but nothing too crazy , changing the location slightly seem to have helped



Victoria H.
1/30/2025
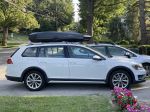
That roof racks look great on your Outback Wilderness, Kevin! I would love to see a photo of your roof box installed once you get the chance.
Bob S.
5/11/2021
Great product
Rachael H.
3/31/2016
You can find this information in the installation instuructions. For reference we have these linked on the product page.
Do you have a question about this Roof Rack?
Condition: Installed
Notes: straps were installed already in eachbars. otherwise, its unused
Info for this part was:
At etrailer we provide the best information available about the products we sell. We take the quality of our information seriously so that you can get the right part the first time. Let us know if anything is missing or if you have any questions.













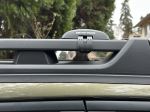

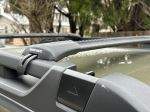

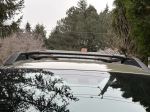


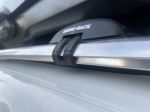















Brooke M.
5/29/2025
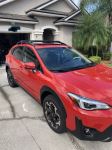
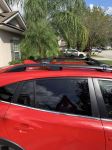
Love the look of the vehicle as a whole! The bars certainly blend right in and look factory! So good to know it was a perfect fit for the '25 Outback Wagon, too! What will be going up there on the bars?